Handsewn Drawstring Pouch
In this lesson, you will be creating your own drawstring pouch using hand-stitching techniques.
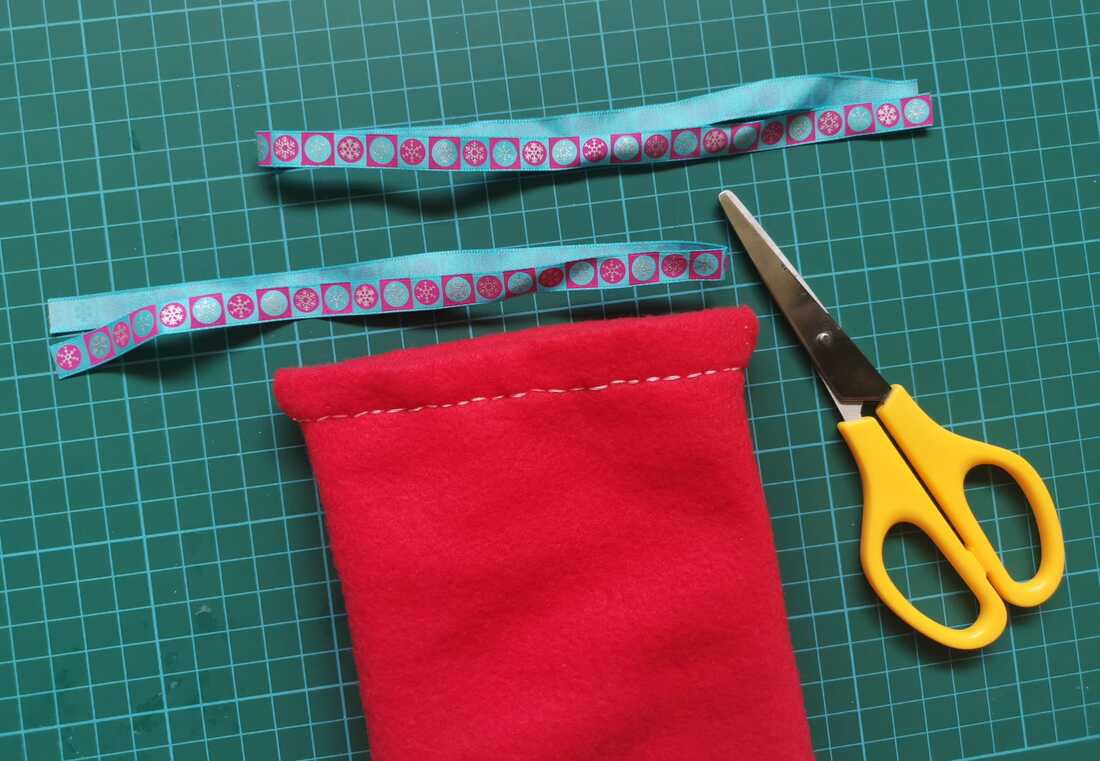
Materials supplied :
1) Felt (note: Using a fabric that does not fray such as felt or polar fleece saves you the trouble of seaming the edges!)
2) Ribbons
3) Needle
4) Thread
5) Safety Pin
1) Felt (note: Using a fabric that does not fray such as felt or polar fleece saves you the trouble of seaming the edges!)
2) Ribbons
3) Needle
4) Thread
5) Safety Pin
Watch the video below to gain an understanding of the steps to making a drawstring bag.
A guided step-by-step breakdown of the tutorial is available below the video.
A guided step-by-step breakdown of the tutorial is available below the video.
Step-by-step tutorial
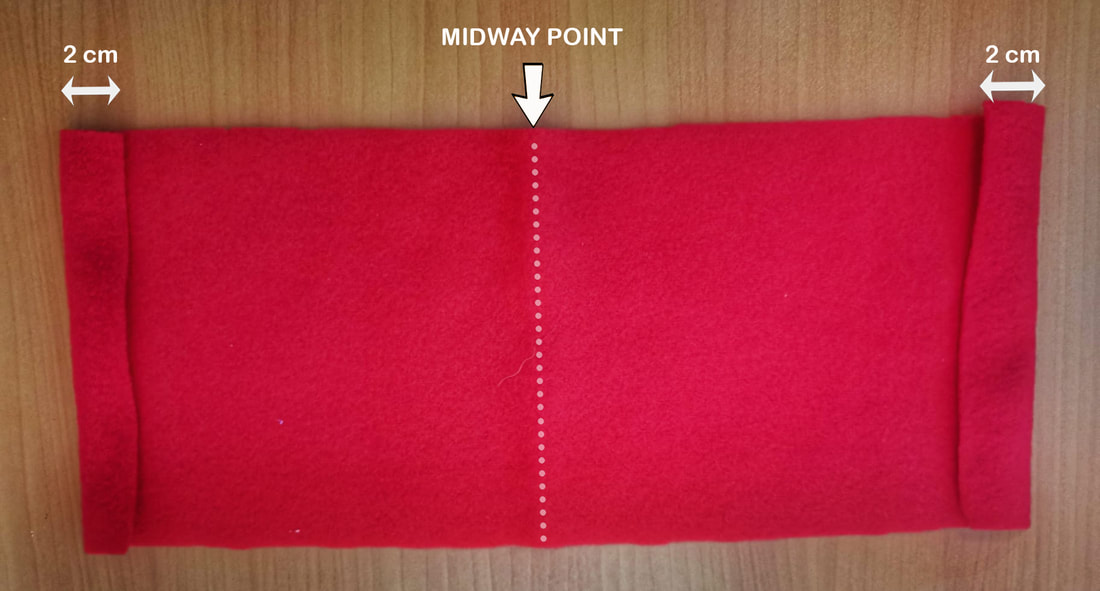
Step 1 : Fold and makes creases on your fabric
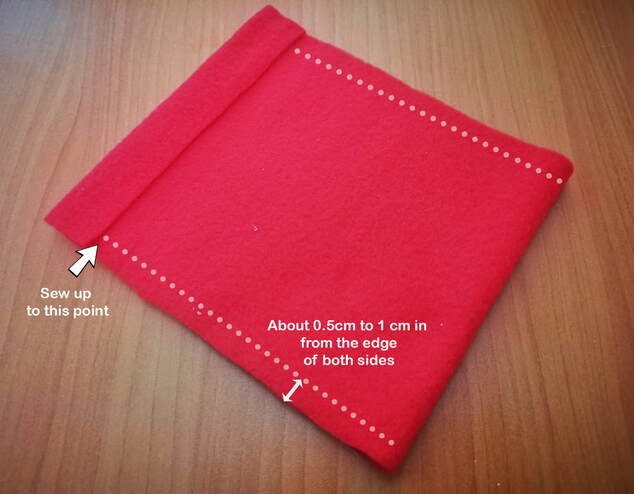
Step 2 : Fold into half and sew the sides
|
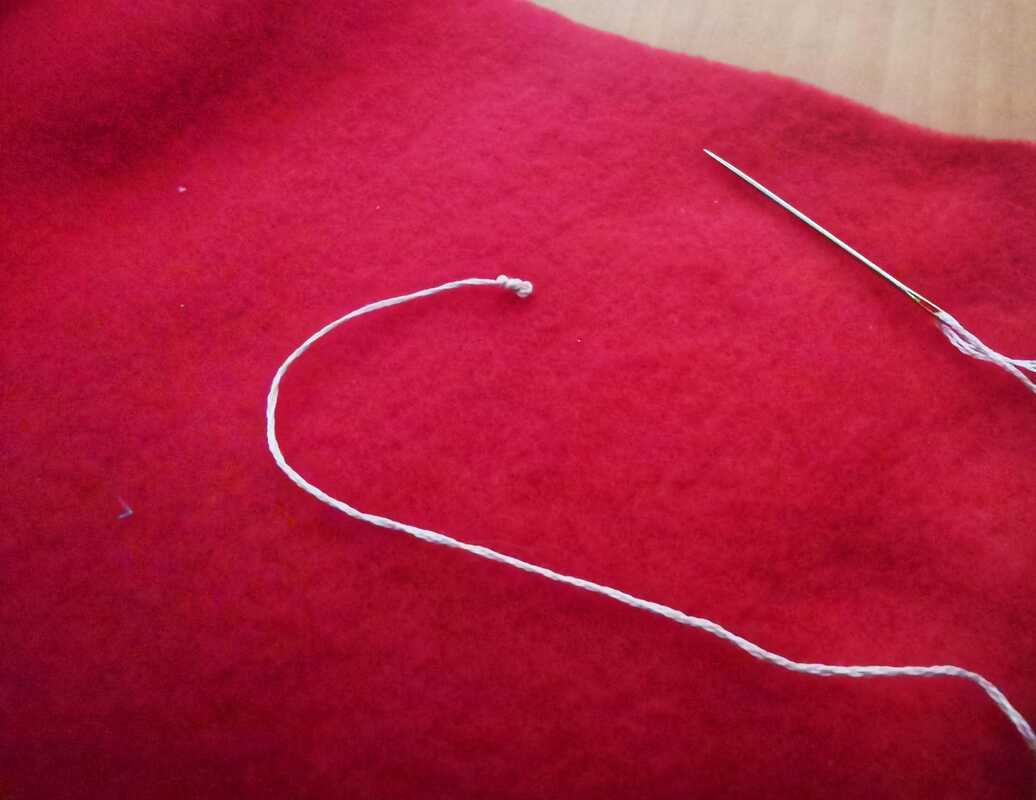
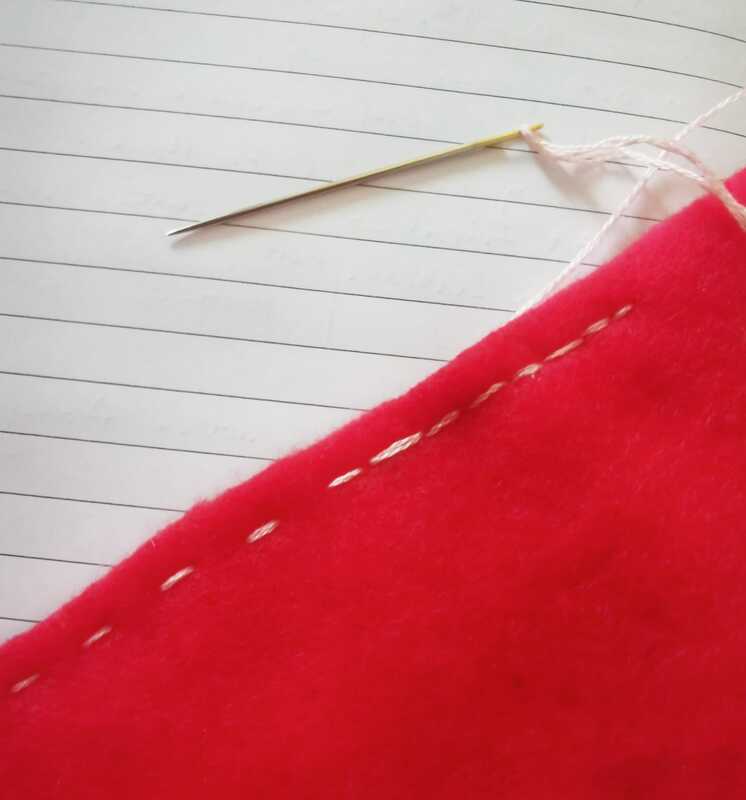
a) Thread your needle. Before you start sewing, ensure that your knot is large enough so that it doesn't get pulled through to the other side. Do a double or triple knot!
|
|
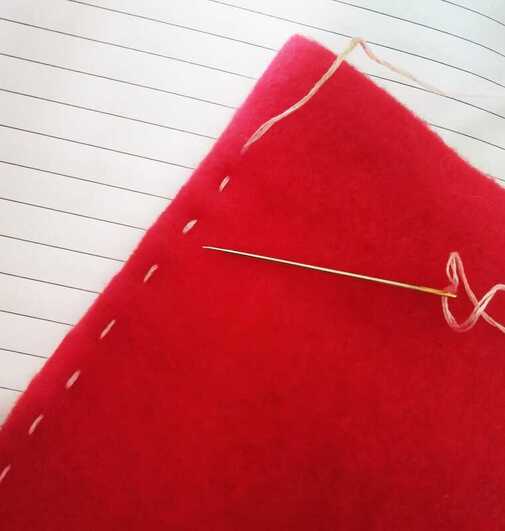
b) Start with from base of the pouch (the folded middle line). Try to keep your stitches as evenly spaced as possible.
This is called a running stitch. Note: Do not sew your stitches too far apart or it will be loose! |
|
c) When you reach the point where the flap is folded down, stitch back downwards using the running stitch until there are no gaps in between. You should end up near the base of the pouch once again. Tie a double knot to end it off.
|
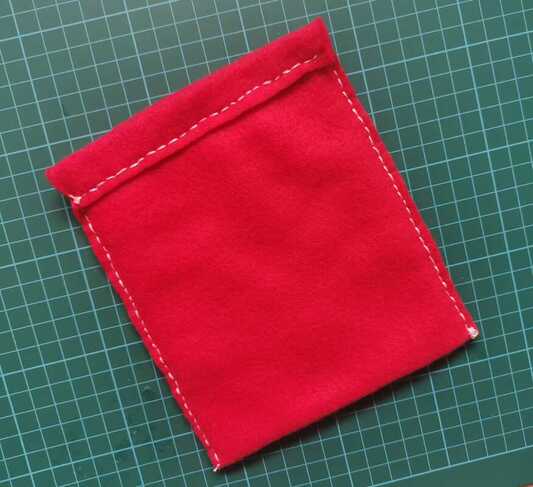
Step 3 : Sew along the folded-down flap.
|
Sew a running stitch near the bottom of the folded down flaps for both sides of the pouch.
The gap between the top edge and your running stitch must be large enough for the safety pin to fit through. Ensure that the knots are visible to you at this point (on the inside of the pouch).
You do not want to expose the knots after flipping your pouch. |
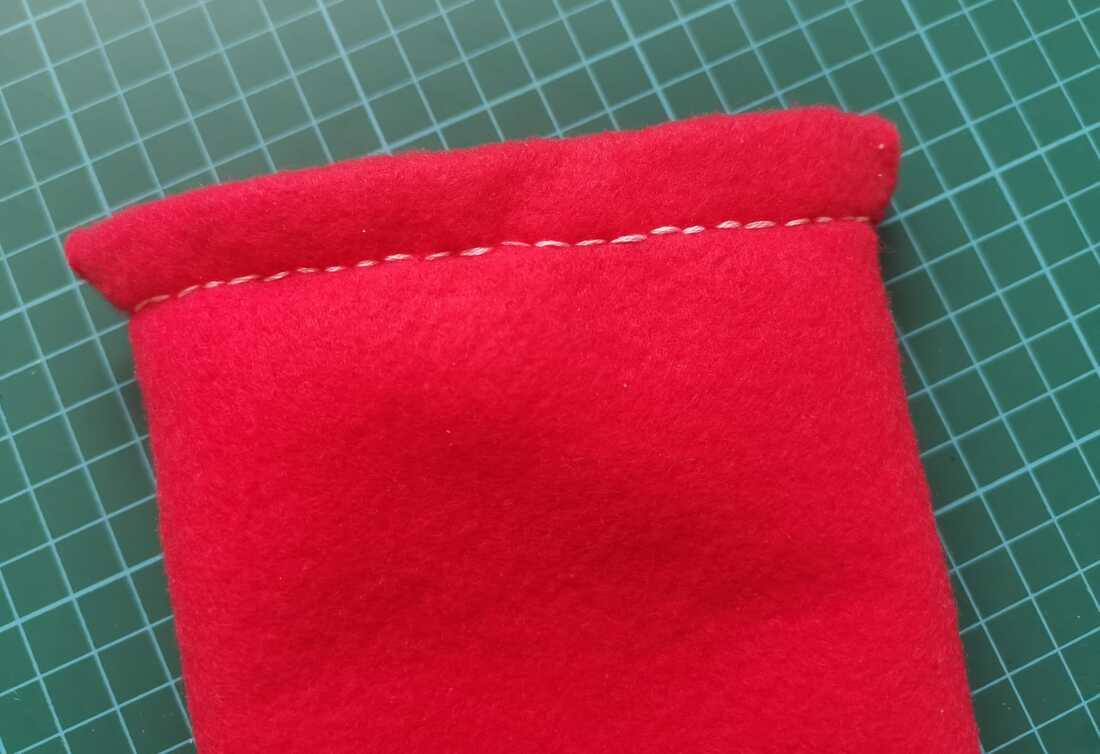
Step 4 : Flip it!
Now, flip your pouch inside out so that you are no longer looking at the inside of the pouch.
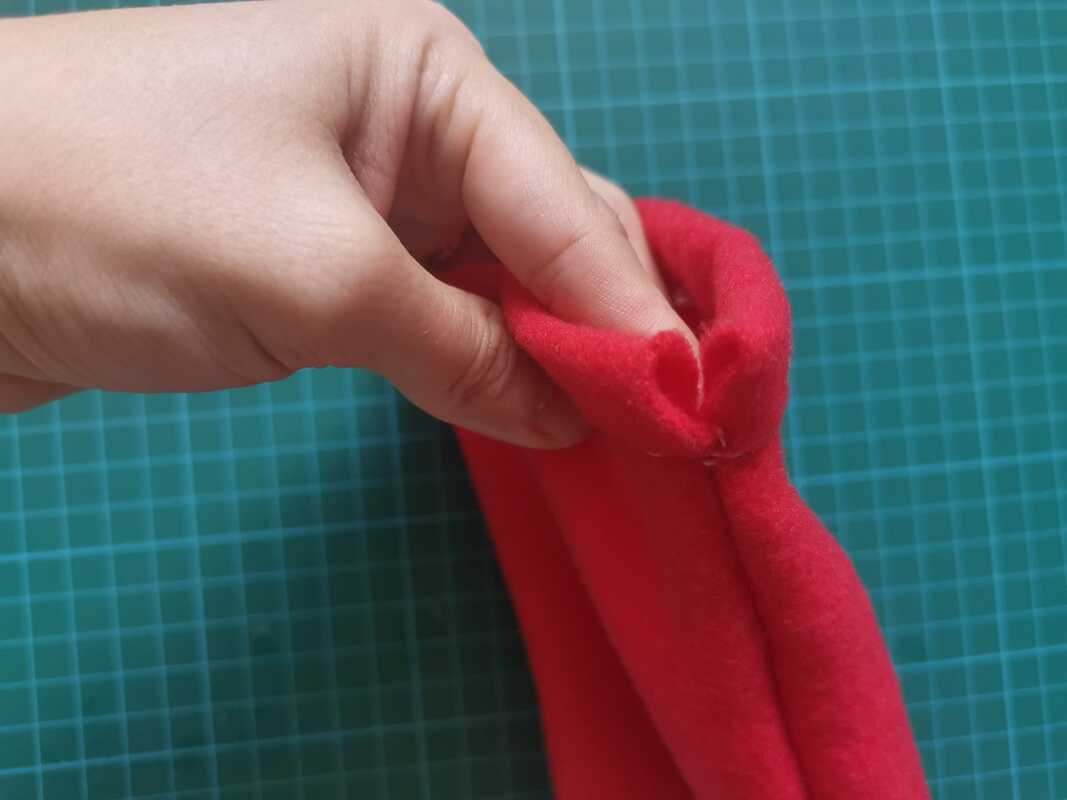
You may use a pen to poke at the inside corners to fill them out neatly.
This is what you should see after flipping :
You may use a pen to poke at the inside corners to fill them out neatly.
This is what you should see after flipping :
|
|
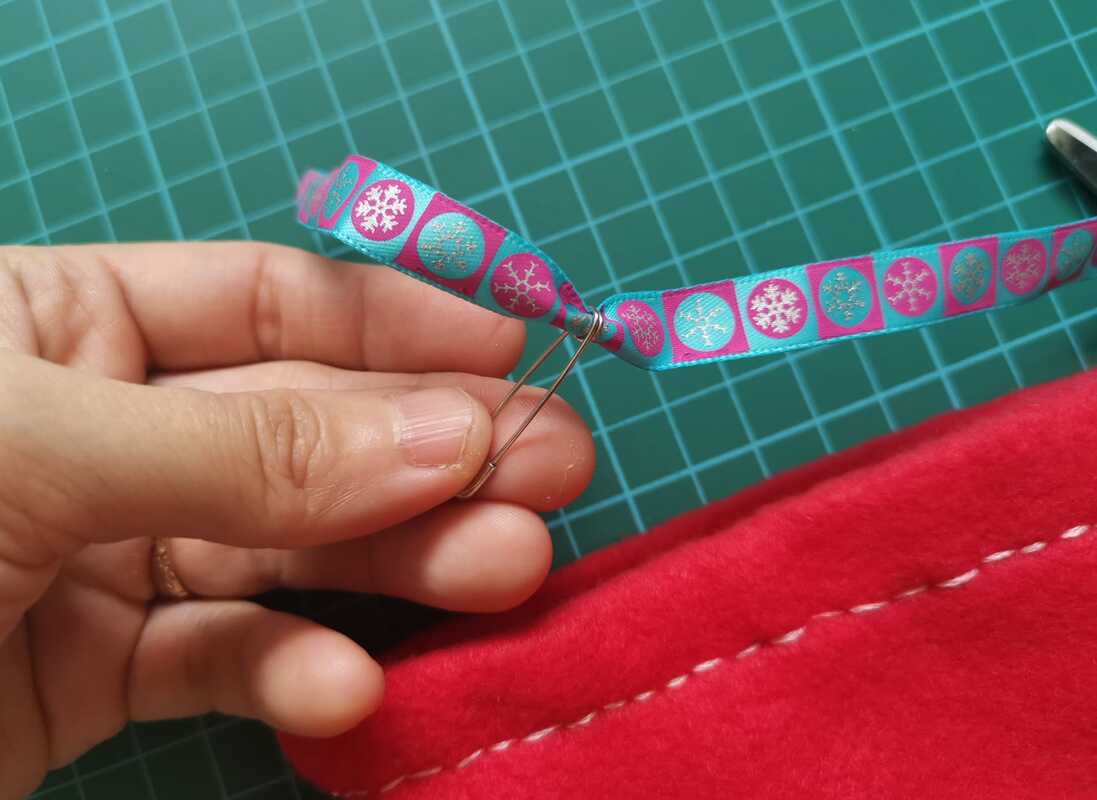
Step 5 : Insert ribbons
a) Prepare your ribbons. You will need two pieces.
|
b) You can fold the end of the ribbon and squeeze it through the end of the safety pin. Doing this prevents the end of the ribbon from fraying, as compared to piercing it with the the safety pin.
|
c) Insert it into the gap and thread it through one whole round.
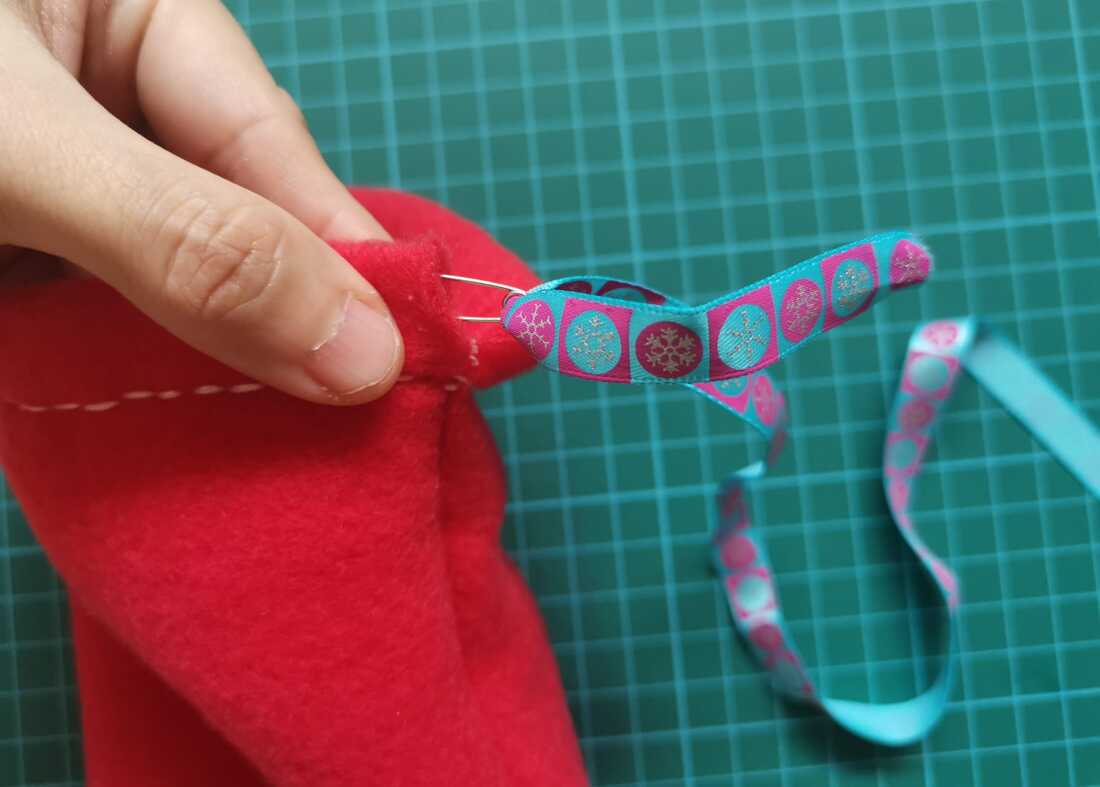
|
|
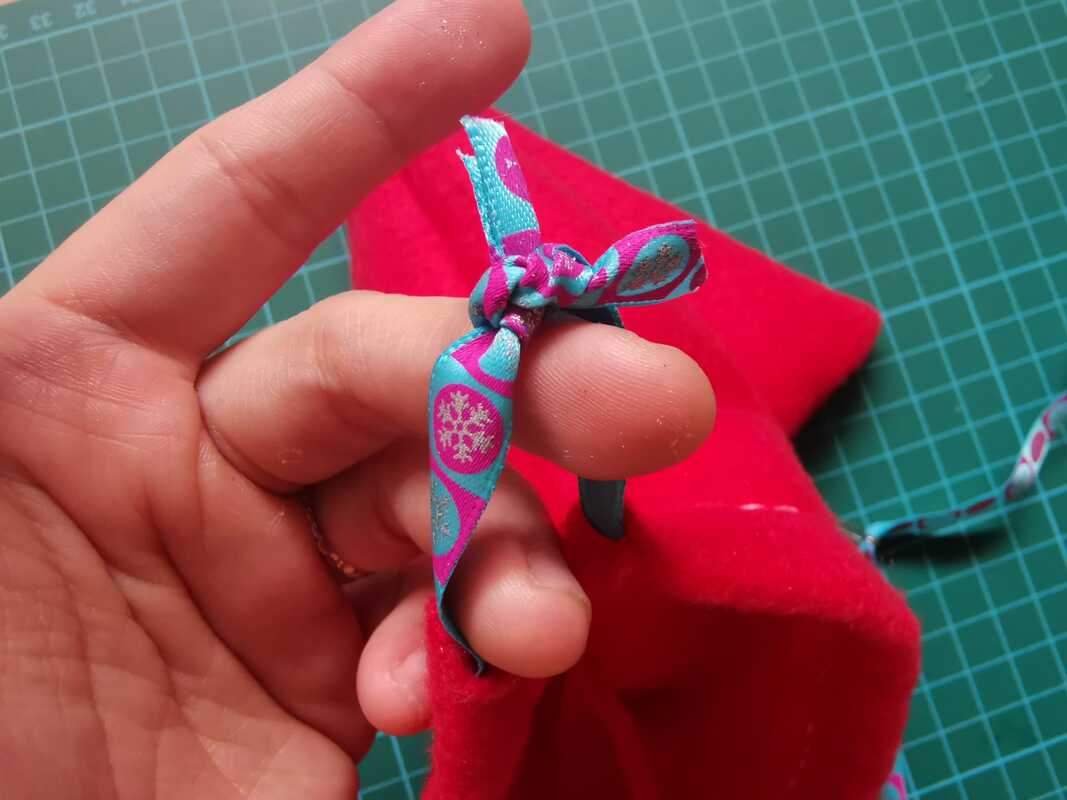
d) Remove the safety pin
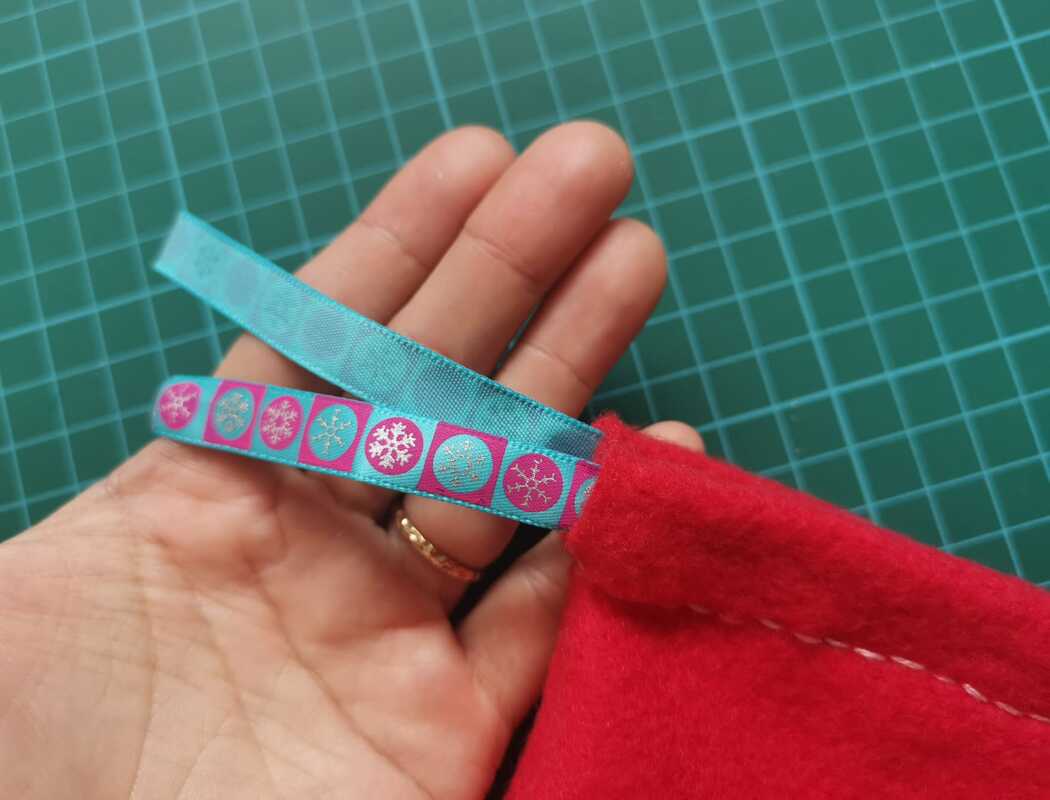
|
e) Tie a double knot
|
|
f) Now do the same for the other ribbon, inserting it from the other end and threading it through a complete loop.
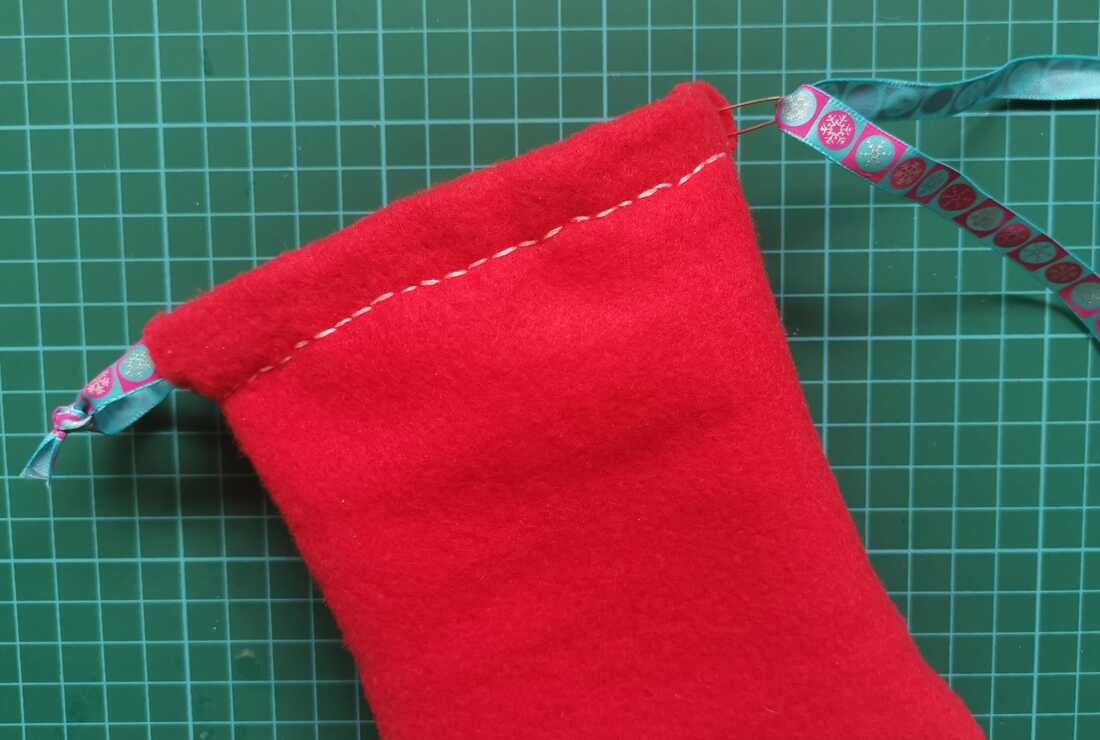
|
g) Remember to tie the ends for the second ribbon too!
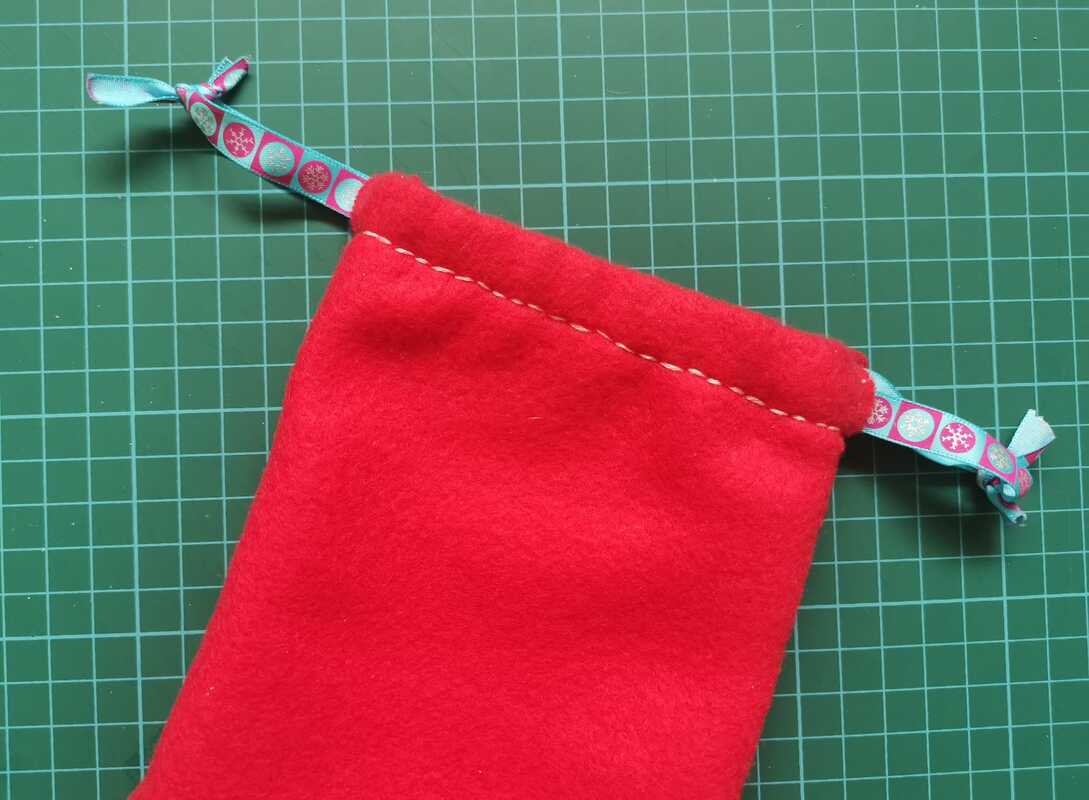
|
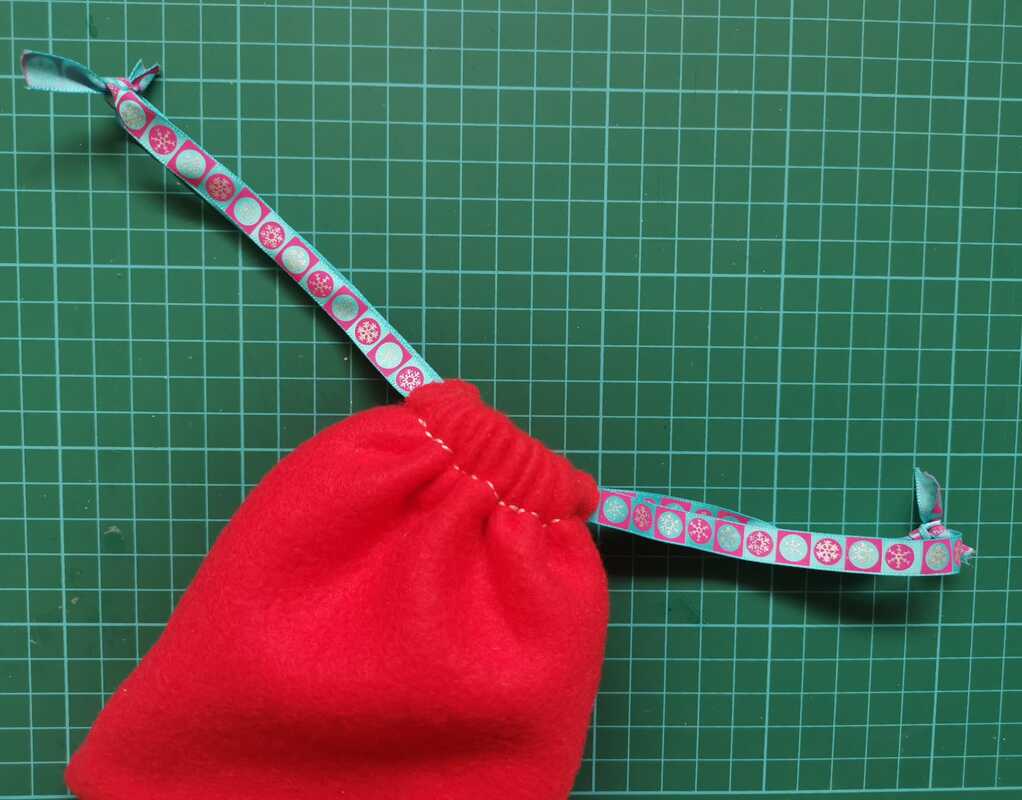
TAADAA!! You now have a working drawstring bag =)
Step 6 (optional, if time permits) : Decorate your bag with embroidery, cutout shapes, jewellery appliques, etc !
Below are some ideas with which you can consider decorating your newly made drawstring bag.
Idea #1 : Hand-embroidered flower ideas
Idea #2 : Cut out shapes from polar fleece or felt and use the blanket stitch to sew on the appliques
Idea #3 : Apply jewellery appliques such as Kundan beads using fabric glue.
Sticking on Kundan beads
