PIXEL ART ANIMATED GIF
What is a GIF?
GIFs (Graphical Interchange Format) are a series of images or soundless video that will loop continuously and doesn’t require you to press play.
It was invented in 1987 by Steve Wilhite, a US software writer who was looking for a way to animate images in the smallest file size.
The short, looping aspect of this format provides a perfect snack for the attention span of today’s consumers. The average file is 2-5 seconds in length, which makes them perfect for grabbing the short 8 seconds of attention given by the average user as they scroll through their social feeds.
Creating a GIF in Pixel Studio
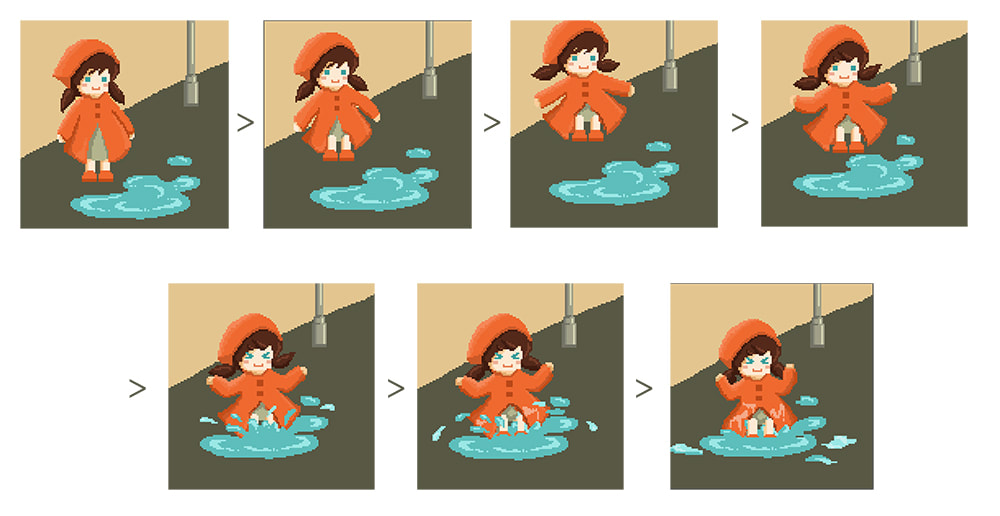
Below is an example of a gif made in Pixel Studio.
It is made up of 7 frames played quickly.
It is made up of 7 frames played quickly.
|
|
To begin, open up your pixel art file that you have done from the previous art lesson.
Click on the animation button (it looks like a film strip), and you will see the animation toolbar appear at the top below your colour palette.
Click on the animation button (it looks like a film strip), and you will see the animation toolbar appear at the top below your colour palette.
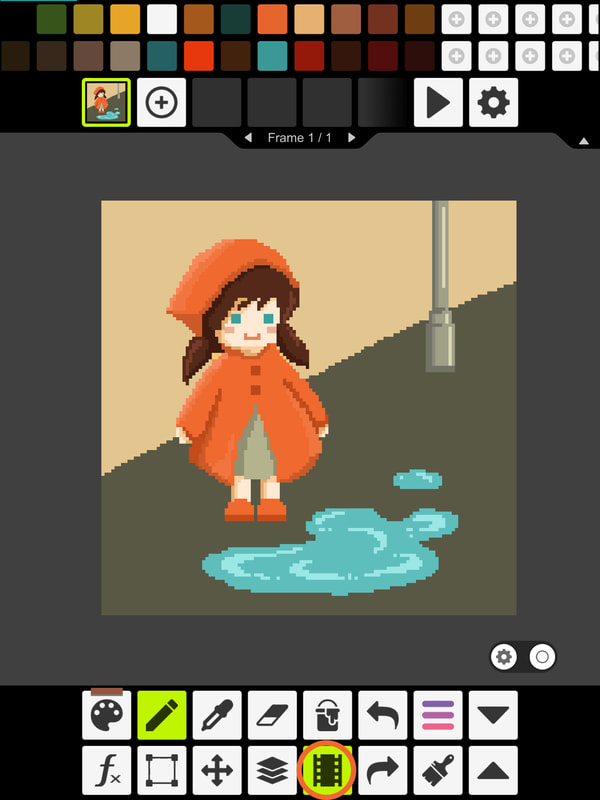
The first frame is your default image.
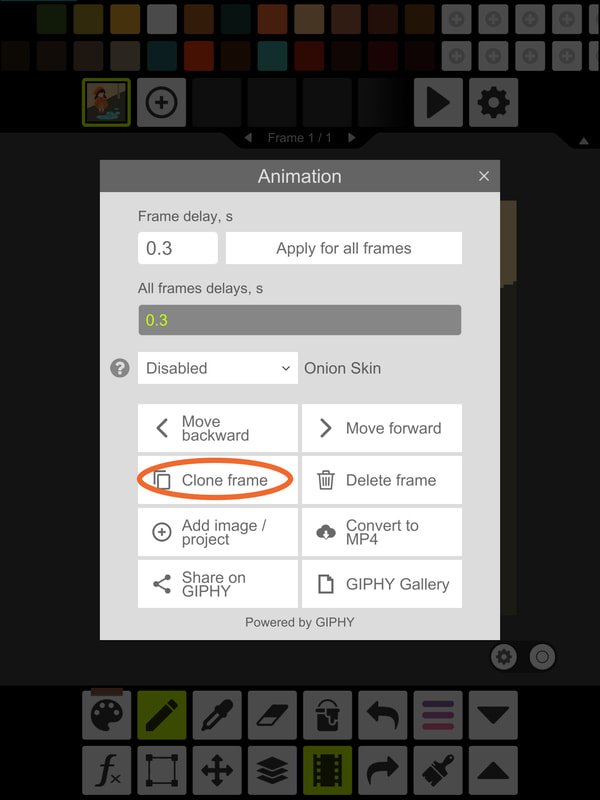
To create a second frame, click on the settings button (the wrench symbol beside the play button).
A new screen will pop up. Click on clone frame.
You will then see a second thumbnail appear in the Animation toolbar.
To create a second frame, click on the settings button (the wrench symbol beside the play button).
A new screen will pop up. Click on clone frame.
You will then see a second thumbnail appear in the Animation toolbar.
You can now edit your second image. Let it be incrementally different.
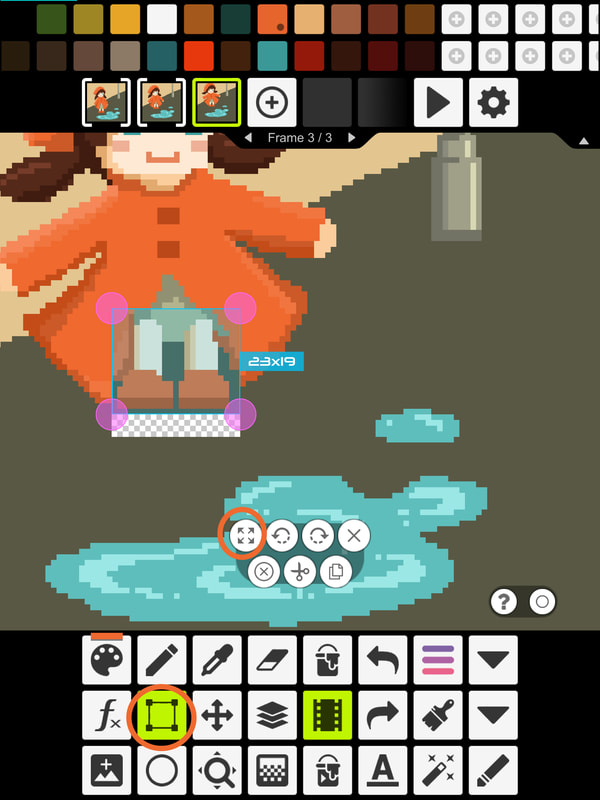
If you've like to move a certain part of your image, you can press the select button (looks like a square).
Then, select the move tool (4 arrows) and move it to the location you want.
If you've like to move a certain part of your image, you can press the select button (looks like a square).
Then, select the move tool (4 arrows) and move it to the location you want.
Repeat the frame cloning and editing process until you are happy with all the frames you have.
Keep it at 10 frames MAXIMUM.
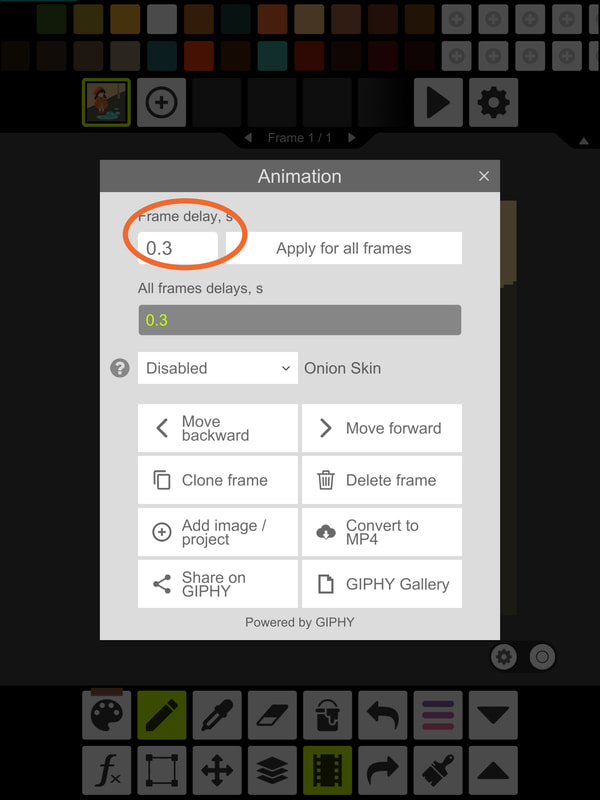
Lastly, play and adjust the timing of the frames by clicking on the gear button (settings) to check that the animated motion is smooth.
Under frame delay, change the number and play it till you are satisfied with the animation.
In the gif example above, I have the frame delay set to 0.09.
Keep it at 10 frames MAXIMUM.
Lastly, play and adjust the timing of the frames by clicking on the gear button (settings) to check that the animated motion is smooth.
Under frame delay, change the number and play it till you are satisfied with the animation.
In the gif example above, I have the frame delay set to 0.09.
Once you are satisfied with the animation, save your work as a GIF file. Remember to resize it.
Congratulations! You have completed your animated GIF =) Share it in Padlet!
Congratulations! You have completed your animated GIF =) Share it in Padlet!
